I’m going to be setting up a Milomade stall at Summer in the Loft on the 10th/11th July – details on the homepage – and I’m very busy getting stock ready for that. Every surface, including the floor is covered with work in progress or work waiting to be packed or finished work waiting to be boxed up. This time around I’m concentrating on my craft collection and making a lot of stationery, lots of badges, some really funky new button necklaces and of course my button flower brooches which are a main favourite.
Talking of which, I bought a shop dummy on eBay recently to show off my button flower brooches, but as it’s made out of polystyrene and covered in a thin stocking type of thing it looked pretty boring when it arrived and I felt the need to vamp it up a little. I searched through my stash of vintage fabrics and old curtains and found a pair of dark red curtains with a simple damask kind of pattern embroidered into it in the same colour. This was ideal as it’s a Milomade colour. So how do I go about making a cover for it?
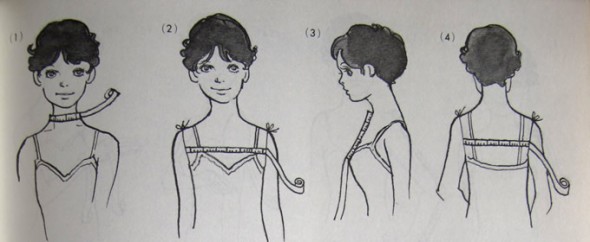
I found a book called ‘Pattern Drafting’ in a charity shop years ago – mostly because I liked the illustrations and detailed diagrams – I never thought I would use it. It’s a Japanese book that has been badly translated in the English and offers instructions both in English and Japanese. The words ‘Easy to Mater’ on the cover are a little misleading.
I sat down and read the chapter entitles ‘Method of Drafting Your Own Original Pattern’ with excitement, but that was soon to turn to frustration when I tried to put the theory into practice.

In theory it seemed pretty straightforward – I followed the measuring instructions and measured my shop dummy, now lovingly called Manny and noted down his vital statistics.

I then tried to follow the detailed instructions of converting my list of measurements into pattern pieces for the front and back.

And it all made sense for a while and I thought this would be easy and then the diagrams stopped corresponding with the text and I got completely bamboozled by it all. I felt really despondent at this point as I thought this was something I’d be able to do.But as I’m not a quitter I did a bit of lateral thinking and came up with another way of doing this.
I found the crappy gaffa tape we bought from Lidl ages ago – a bit of a dogy batch that we have no use for – as well as an old t-shirt I didn’t mind sacrificing for the Milomade cause and set to work:

I covered Manny completely in gaffa tape and then cut all the way up the side to form the front and back. I then cut these in half again, so that I could just concentrate on getting one side done as I could could then place this on a fold in the fabric and cut both left and right pieces at once in a symmetrical manner.
I then found some thin lining fabric from another old pair of curtains and cut out my pattern pieces. I haven’t got any more photo’s of the process at it got a bit intense and I put my blinkers on just to get it finished. Because Manny is made of polystyrene it was easy to tack the pieces together and then pin then to him and see how they all fitted together. I had to do a few adjustments but then felt ready to cut the fabric.
I sewed the front and back pieces together and then do a few fittings and adjustments and extra sewing until I got it just about right. I was going to put a zip up the back, but I hate sewing zips, so I decided to just pin the fabirc tightly instead. And here is the result:

Doesn’t Manny look lovely! I did want to pin all my brooches onto him without the white card, but they didn’t stand out enough against the fabric. I think I need to stand him in direct sunlight for a while so that the fabric fades. But for the time being I’ll keep the card behind the brooches I think, unless someone know of an easy, effective way to fade fabric that won’t damage it. Any suggestions welcome – please leave your comments below.


